
ipfilterX Instructions
________________________
Alternatives to PeerBlock for Mac OSX and Linux users


![]()
NOTES
All the users that load ipfilterX2 don’t need to load ipfilterX because ipfilterX2 already contains ipfilterX ranges .
Automatic Update Link is now added with an unique generated secret key to update ipfilterX in your client.
For Update News check our webpages and/or Subscribe on our mailing list.
![]()
Security Ratings Legend :
[LOW – MEDIUM – HIGH – CRITICAL]
![]()
Usage in Peerblock
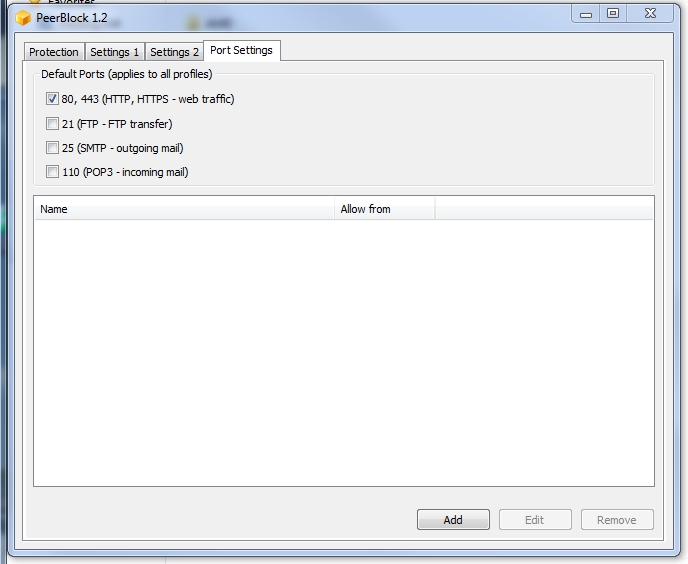
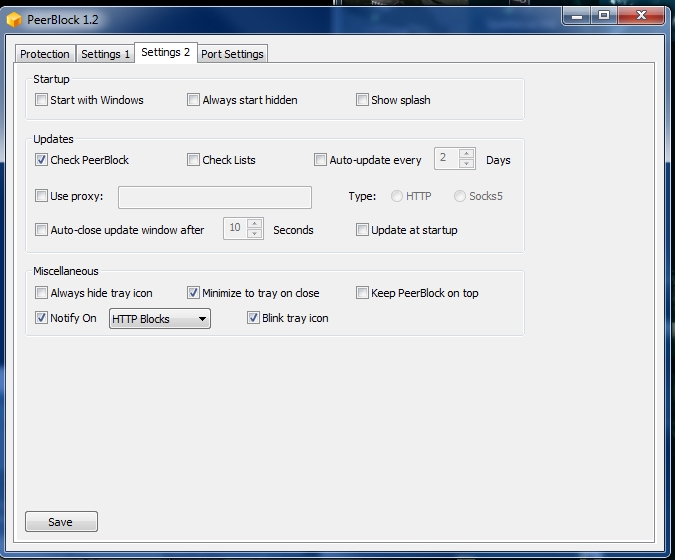
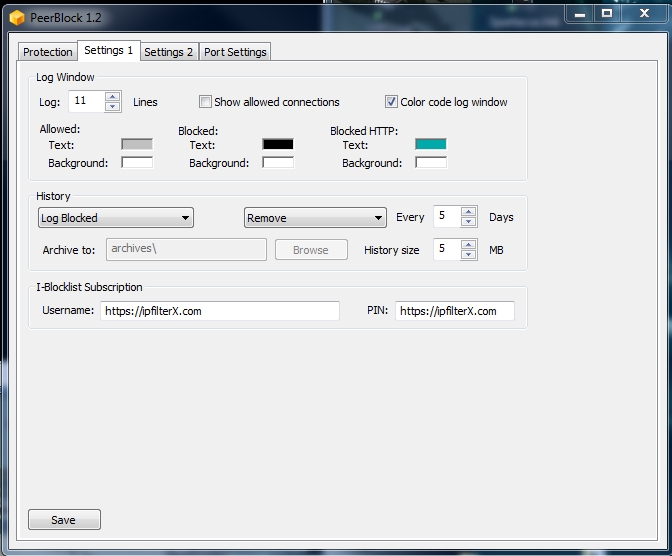
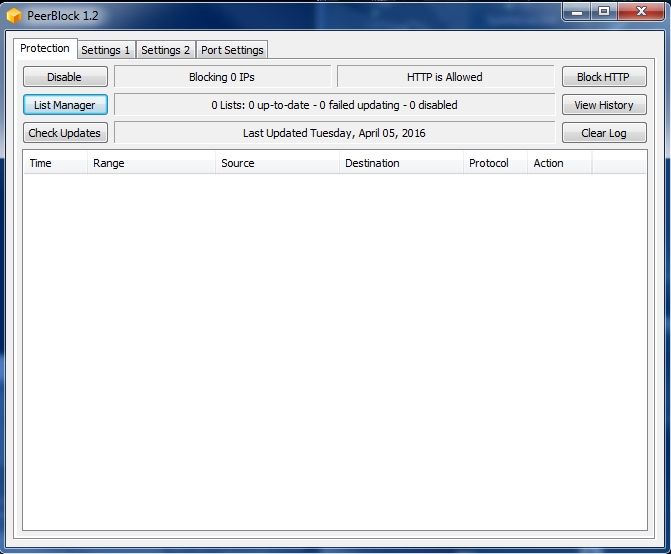
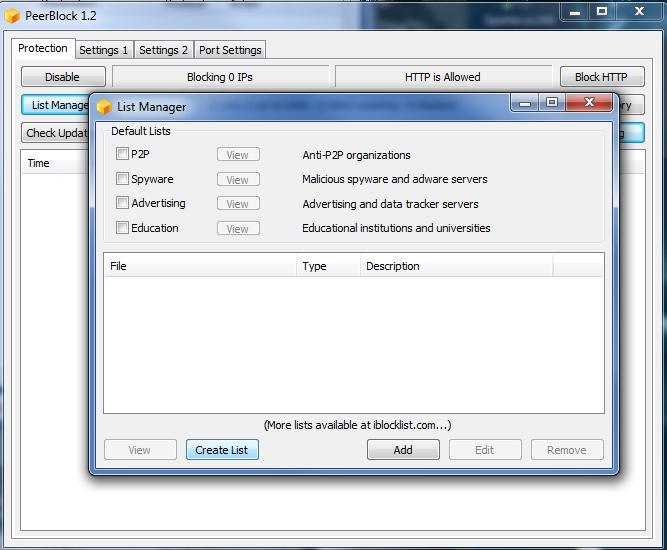
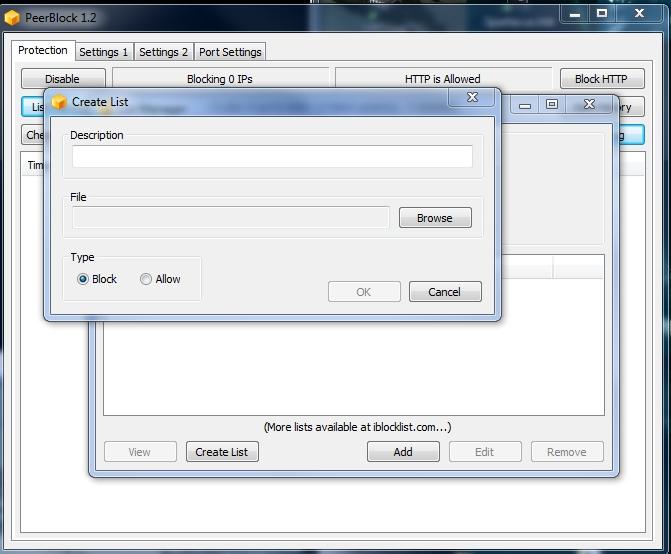
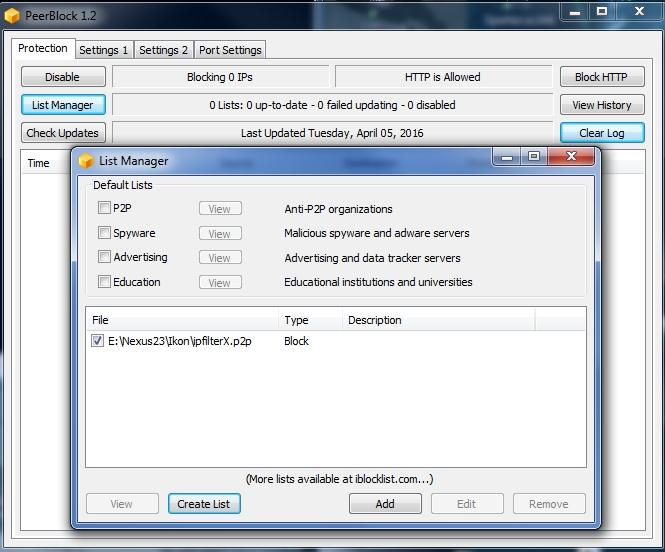
Remember : use one path to load ipfilter file, so next time when you will overwrite old ipfilter, the program will load the new where the old one was found in first instance.

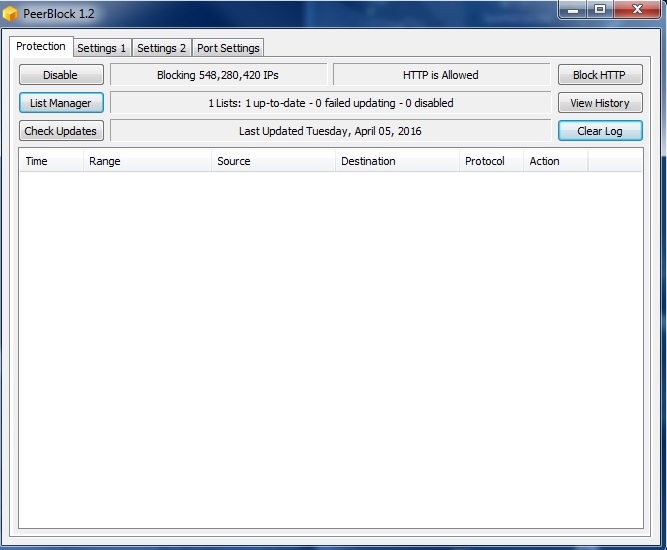
Then close the window and get the result:
 All well.
![]()
Usage in eMule
– Paste ipfilter.dat into :
- C:eMule0.49a_BETA1eMuleconfig
– OPTIONS – SECURITY – then RELOAD if you added or downloaded a new ipfilter.dat file
![]()

Usage in uTorrent
Be sure that you go to Preferences -> Advanced
and down the list you find the value “ipfilter.enable” then set it to “true”
(You have to make this operation only one time , but check from time to time after upgrading to new UTorrent Version)
PATH:
WINDOWS 7 – 8 – VISTA :
– Add ipfilter.dat at path example :
– C:UsersYourUserNameAppData
Windows XP :
-Add ipfilter.dat at path example :
– C:Documents and SettingsBillGatesApplication DatauTorrent
-Copy in the folder above then restart program ;
-Click Options
-Click Preferences
-Click Advanced
-Make sure ipfilter.enable = true
read uTorrent Ipfilter FAQ as further instructions
–Windows sVISTA / Windows 7 Seven :
- Download the file to C:UsersusernameAppDataRoamingutorrent
- Open uTorrent
- Click Options
- Click Preferences
- Click Advanced
- Make sure ipfilter.enable = true
If ipfilter.enable was false you will have to restart uTorrent after changing it to true.
![]()
SYMANTEC FIREWALL
How to block range of IP addresses (Subnets) using Symantec Endpoint protection Firewall rule
Some times we might want to block IP addresses ranges using Firewall rules
For example you might want to use specific firewall policies just for IPs from 10.0.0.1 to 10.0.0.220
The existing default firewall policies does not allow you to add multiple IP addresses
We just get one IP address to add
In order to use my custom IP range in firewall rules I need to create HOST GROUPS
HOST GROUPS in simple terms.
Host group is a collection of DNS domain names, DNS host names, IP addresses, IP ranges, MAC addresses, or subnets that are grouped under one name so that you don’t need add IPs individually
ADDING HOST GROUPS (Step 1):
In the console, click Policies.
Expand Policy Components, and then click Host Groups.
Under Tasks, click Add a Host Group.
In the Host Group dialog box, type a name, and then click Add.
In the Host dialog box, in the Type drop-down list, select one of the following hosts:
IP range
Enter the information for each host type.
Click OK.
Using Host Groups in Firewall Policy:
Once you have Created host groups
open console, click policies
Select Firewall policy
Select rules
Create a blank rule
I made it as BLock IP Range
Double click on the Host (By default it will be any)
Now you will see your host group what you added in Step1
Define host relationship
Select if you want to make it local/remote or source or destination
(Source/Destination is dependent on the direction of traffic. In one case the local client computer might be the source, whereas in another case the remote computer might be the source)
(Local and remote :The local host is always the local client computer, and the remote host is always a remote computer)
Check the host group
Click Ok
Select the action as Block
Click Ok
Apply the policy
That’s it we should good with our rule for that particular IP ranges.
![]()
 Windows Firewall Import rules feature
To import deny rules (blocklist) in Windows firewall you have to install Powershell
then follow these instructions:
Windows Firewall Script To Block IP Addresses And Country Network Ranges
The host-based Windows Firewall is easily managed through scripts and the NETSH.EXE command-line tool. This article is about a simple PowerShell script which can create rules to block inbound and outbound access to thousands of IP addresses and network ID ranges, such as for attackers and unwanted countries.
To get the script, download the SEC505 zip file here or from the Downloads page, open the zip and look in the “Day5-IPSec” folder for the script named Import-Firewall-Blocklist.ps1 (and the sample BlockList.txt file too). Like all the other scripts in the zip file, this script is free and in the public domain.
The script can also create firewall rules which apply only to certain interface profile types (public, private, domain, any) and/or only to certain interface media types (wireless, ras, lan, any); for example, you might wish to only block packets going through an 802.11 NIC (wireless) but only while not at home or at the office (public). The script is just a convenient wrapper around the built-in NETSH.EXE tool.
Requirements
The script requires PowerShell 1.0 or later.
You must be a member of the local Administrators group.
The script runs on Windows Server 2008, Windows Vista, and later operating systems.
A text file containing addresses to block must be passed into the script as an argument. This file must have one entry per line, each line containing either a single IP address, a network ID using CIDR notation, or an IP address range in the form of StartIP–EndIP, for example, “10.4.0.0-10.4.255.254”. Both IPv4 and IPv6 are supported. Blank lines and comment lines are ignored; a comment line is any line that does not begin with a number or hex letter. Even if the input file was originally created for Apache or iptables, it can still be used as long as the formatting is compatible (or made compatible with a bit of scripting).
Note: If you want similar scripts for Windows XP and Server 2003, that same zip file above also contains VBS and BAT scripts that all begin with the word “Firewall_*”. Look in the VBScript directory.
![]()
HOW TO BLOCK IP ADDRESSES IN WINDOWS USING IPSEC
![]()
![]()
TRANSMISSION – UPDATE YOUR ipfilterX OFFLINE
WINDOWS – MAC : Go to C:UsersNAMEAppDataRoamingtransmissionblocklists
You will find a file named blocklist.bin , 0 bytes ,
update with ipfilterX url that field , first extension .dat of the two lines of files,
it will be autorenamed and/or converted to blocklist.bin , the file needed , done !
![]()
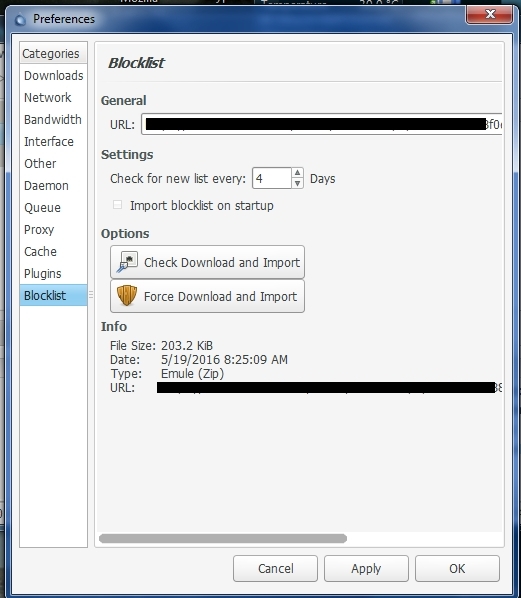
 DELUGE
Deluge works with Autoupdate link ipfilterX feature , thus it supports SSL Connections.
Just go to EDIT > PREFERENCES > PLUGIN > CHECK/ENABLE BLOCKLIST PLUGIN
ADD your ipfilterX LINK+KEY ID > Wait until download will be complete
DONE: ipfilterX extension that works in Deluge is .gz
![]()

Please report any problem encountered to nexus23 [at] protonmail[dot] com
Made by Nexus23 Brotherhood

